Showing posts with label Editing. Show all posts

Sunday, 1 March 2015

Audience Feedback: Lew Parker

I posted my video on Facebook for the first time. I asked my my mum to share it with her friends also to broaden who could see it. Unfortunately we didn't get much feedback apart from 'That's so good' or 'you're so talented' so I took matters into my own hands and sent it to Lew Parker. I knew that he had helped George or more pulled George's to pieces so I thought it was exactly what I needed. And today he finally replied!


I agree with him with most basically all of it - I am going to take time to go through it and make sure the lip sync is on point. I also feel that the black and white is very basic so I feel grading or editing it more will be good. I feel I can incorporate more shots with camera movement for the performance element as I feel it is too static and needs some variation. This shouldn't be too hard to refilm hopefully! I will do some research into grading and see how I can use it as he seems to go on about it a lot so I feel it will be helpful! 


Friday, 20 February 2015

Editing: Final Draft

I finally managed to complete my music video :D

For the final section of my music video I experimented with the slow motion to get the clip of Hattie and Maddie crashing into each other more dramatic and so it happened on the beat. I experimented with different percentages to slow it down but I came to the conclusion that 50% is the best.


I also played about with the focus on one of the final clips. I wanted the note to be in focus and Hattie walking out in the background to be out of focus. This was the final result which I was very pleased with. 

I didn't need to put any sort of effects on the clips where Hattie runs out of the house, as it was a very sunny day. Unfortunately during some of the clips we recorded as a 'dash cam' there was a glare on the screen from the sun so you couldn't see clearly. 

Overall I am happy that I have finally finished my music video. About time! 


Filming: Day 4

Final day of filming

We have finally finished our filming. YAAAAAAAAAAAAAY :D :D :D

On Tuesday I had to prove that I had done some of the filming, so to do this I set up the camera and Jess just pressed record. I managed to take some selfies when setting up the camera as proof.


Unfortunately there were many badass shot that we couldn't use as there was too much footage to fit into the film :( but I put in what we could 

I am now going to film the final 15 seconds of my music video - eeeeek 

LETS DO THIS 

Tuesday, 10 February 2015

Editing: Split Screen and Ending!

I got some inspiration from a past students work as I wanted to show some of the techniques I have learnt throughout this year. Split screen is a simple yet very effective use of technology and I wanted to throw a little bit of variety into my music video as all the shots were starting to get repetitive.

This is the split screen that I created which on the end of each line the clips move in an anticlockwise position.

Between each clip I chose to use a cross fade so it merged into once another rather than cut sharply. 

Towards the end of the music video, Hattie walks out of the shot leaving a white background and the microphone. 
For this I am going to try to get the background to fade out leaving just the microphone on the screen. I feel fading to white at the end is much more subtle than black as the majority of the shot is white. 

I have also included a MTV logo in the corner of the screen to give it that sense of a music video throughout the whole video and also to show what it would look like if it was to be shown on TV. 


I had to photoshop the image to get it without the white background and put it onto a transparent file to give it a more professional look. I chose the black and white version of the logo as it fits more with our music video as a large proportion is in black and white. 

I used the music beat to put shots in to connect the visuals to the music (one of Goodwins theories) this makes it more aesthetically pleasing to watch too :) An example is when theres an important chord in the music and you have a shot of Hattie's hands playing the chord on the piano. 


Although I have a 1 minute clip of music video that still needs to be filmed, I am very pleased with how it is starting to turn out. Although I wouldn't go as far as to say I like it, but I feel it is much better with more clips (obviously). I plan to film the last section tonight or within the next few days, it is dependent on weather and actor availability! 

Demons - DRAFT 2

DRAFT 2 -

Here is a second draft of our music video, it is still unfinished but Molly has been busy editing the rest of this whilst I've been busy doing the filming. Hopefully we will have the last minute of footage within the next few weeks and fingers crossed after that I can get on with some editing and we will have a finished video! I've also included the first draft of our music video in this blog too as I haven't yet uploaded it, so you can see the difference in the two drafts without having to scroll your way through lots of blog posts to find the first video!

DRAFT 1 -

Thursday, 5 February 2015

Final Cut Pro Lessons

As we are editing using Final Cut, I thought it would be a good idea to re learn some of the skills I learnt at AS Level in order to be able to edit effectively. And, of course; learn new skills that I can use in my music video. The first tutorial I looked at was a split screen tutorial, as we had a good idea of splitting the screen into four sections and having multiple action shots in each section. We got this idea from a past student video, and so I thought it best to learn exactly how to do so using YouTube tutorials. This is the video I chose to use. 


I also wanted to find out how to use slow motion on Final Cut, I had already learnt this last year but as I haven't used the programme for a while, my skills are a little rusty and needed to be learnt again! We wanted to try and use slow motion in some of the clips where the two girls are playing with the leaves in the park to help create a bit more emotion and alter timings. I found another really usefulvideo to help with this. 


Lastly,my final skill that I wanted to learn was to do with changing the colour effect of certain shots, to either enhance the colour, or darken. For example, there is a lot of footage that we wanted to use in black and white and other footage such as the forest footage that we wanted to be brighter and bolder to reflect the moods and feelings of the shots. Here is a clip that I used and found useful.


Hopefully,when we have uploaded all the footage we have got from today I will have another go at editing using all of these new skills I have learnt!

Update and Filming Photos!

Hello again!

It's been a busy day today, Molly and I finally got around to finishing most of our filming! After a long, long wait, it is very nearly complete. All we have left to film is a few scenes with Molly and her family arguing, and a few shots with Maddie to fill in gaps and we should be good to go! I managed to get a few pictures of us filming our final clips and these are below as filming evidence. Also, I have completed Past Student Music Video Examples and these are up on the blog, there is analysis for 'Viva Brothers', 'Crash' and a video from another school 'Can't Hold Us'. I also managed to post my analysis of Past Student Auxiliary Tasks. I analysed all three types of tasks, although I did choose to do a website and poster after this. I had already decided to do a website but was still torn between a digi-pack and poster.

In the next few days I hope to have my draft evaluation up on the blog, although not my final answers. I am slightly behind on these I have been focused on my auxiliary tasks but I have completed both questions 1 and 2 and hope to have these up on the blog tonight/tomorrow; and will continue work on the last two questions tonight also. Also being put on the blog tonight is a shot list for our video and a draft of my poster, which I did do a while ago but forgot to put up here! Hopefully the final poster will be up by tomorrow too, so expect lots of blog posts in the next few days!

Finally, here are some photos of us filming our final performance scenes -

Friday, 5 December 2014

Draft: Demons - A2 Media

Brief show of what I have done so far, I know its not finished yet, however I have completed over half of it now!

Take a look below, any feedback is more than welcome :D

Wednesday, 19 November 2014

Editing: Colour Correction

So we finally managed to start editing!! WOOP WOOP!

However, on the day we filmed it wasn't as sunny as we would have liked and it started to get dark. Which posed a challenge for me when editing as it meant that I had to start colour manipulating to recreate the effect that it was a sunny autumnal day using the colour board and some of the presents I managed to find an effect which managed to enhance the colour which I wanted to enhance without making it look too fake. I then used the percentages given for shadows, mid tones and highlights and put those percentages on each of the clips that I had to consistency within the video.


From these two images you can see the effect that using these setting had: 

The left is before and right after, as you can see I added a sunlight effect to make the colours seem more real and give the impression that the video was filmed on a very sunny day. It also gives a sense of a home video as professionals would not want these effects which links to the first bit of the memories that we see which has the home recording effect on it. 

So far we haven't had much chance to film due to jobs etc, however we plan to film quite a lot more on Thursday evening and then we will start to have a draft of our final music video. 

Saturday, 18 January 2014

Editing Process: our Thriller Intro Draft

To get to the stage at which we have a completed draft, we spent many weeks editing and putting together each section of footage into a sequence of around 2 minutes. Firstly, we uploaded all of the footage to Final Cut Pro X. We then went about cutting down each clip to ensure it started at the right point and ended exactly when we intended that shot to end. We first started to edit the flashback scene, of which Alex and I filmed. Alex demonstrated the 'blade tool' which allowed you to separate sections of clips, meaning we could change the order of some shots to maintain continuity. For example: when editing the sequence in which Hannah 'runs off' we had to change the order of clips as the 180 degree rule had been broken. 
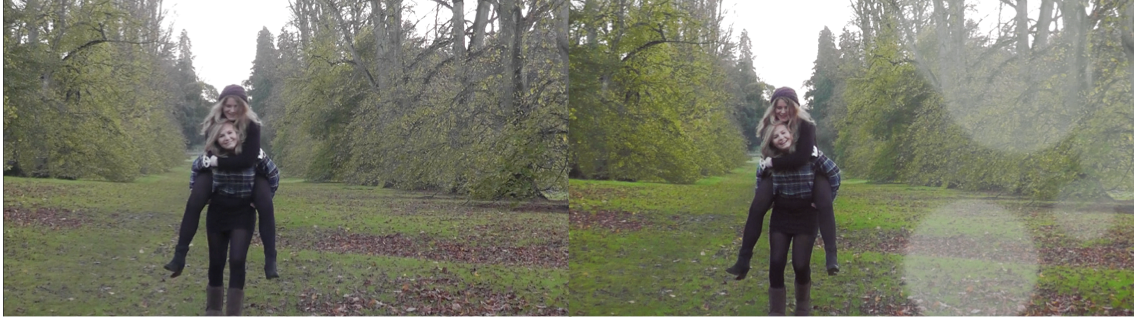
Because a heavy theme in our thriller is flashbacks, we explored the transitions option. We found a 'flash' transition, we think it does a good job of being symbolic of the flashback itself.


 In the scene where the grandad is alone in the shack, we struggled to create a smooth and flowing sequence. We again used the blade tool in order to change the duration of certain clips to find a way of making sure each clip has a smooth and natural transition into the next. We didn't want the editing to be too fast so we went back and extended the extent of some clips, even applying slight slow motion effects to achieve this to a greater extent. We did find however, that this affected the sound of the clips; deepening and distorting the diegetic sounds.


 We then worked out how to 'ditatch' the audio, meaning that we could remove it and apply other sound effects to take it's place. For example, when the grandad puts his foot onto the wooden floor, we inserted a thump sound. We found the sound too sudden and thought the clip ended too quickly, which meant the focus on this scene ended too quickly also. We therefore decided to try out the echo tool. This function allowed us to extend the feeling of this scene even into the next scene, through applying a 3 stage echo, lasting for 2.5 seconds. This also helped to develop the eerie feel that is created by the dim lighting we used.

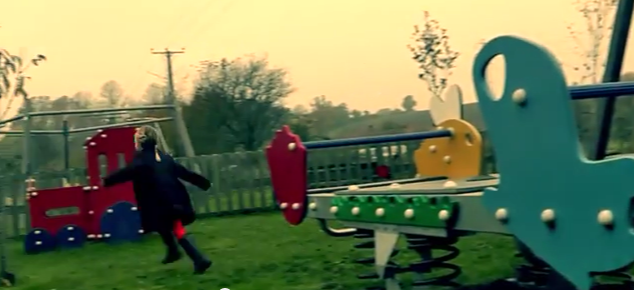
We used sound and slow editing to create an unsettling and uneasy feel in the flashback scene in a playground. The footage is reasonably slow paced, some of which being in slow motion, slowed by up to 40%. This was heavily contrasted by our choice of music. Although the music is not fast, it has an intense, eerie and creepy feel which when partnered with slow paced footage, connotates danger and we feel makes the audience feel on edge.


One final thing we considered before handing in our draft was the stability of our clips. Some shots were not taken with a tripod because of the awkward angles at which we shot for effect. This turned out to be much less of a problem as we thought due to us finding the 'clip stabilization' option. We applied clip zoom stabilization to the shot where the camera zooms very slowly into the articles, and pan stabilization to the shot in which we see a pan from the grandad to the girl. Luckily the majority of our footage was captured with the use of a tripod because stabilizing clips took hours, even before the rendering process. However we managed our time by ensuring that all necessary changes were made before we started the rendering process. 


We used Final Cut's sound layering options to attempt at a tense and suspenseful atmosphere. In the sequence where the grandad is alone in his dilapidated shack, we use multiple layers of non diegetic sound, which means sound that happens off screen. We found a piece of royalty free suspense music to play subtly in the background. We adjusted the volume of this by right clicking on the sound and adjusting the sound levels of that particular layer. We then added a thunder and rain sound file, which we increased in volume. We chose this particular sound due to it's contrasting high and low points; with quiet periods and then sudden transitions into crashing thunder, this leaves audiences on edge, adding to the thriller convention of suspense.

Finally, we added the sound effect of dripping with echo. This gave the idea that his shack is old, derelict and dilapidated. This use of setting can lead the audience to believe he can't be trusted or there is something about his persona that may not be quite 'right.'

Wednesday, 4 December 2013

Editing: Flashback Effects

Flashbacks: We decided for the flashback we wanted the colours to be bright and vibrant very juxtaposed to the current time. This will make the flashbacks obvious therefore cutting down the confusion when jumping between time frames.


This is the original film without any effect, although the colours are bright it doesn't give the effect that we wanted. The colours are quite dull as it was filmed on a cold wet day therefore we need to give it some brightness as though its sunny to create pathetic fallacy with the characters


This is the hue and saturation effect gives the greens and reds extra colour however it doesn't effect all the colours in the frame which we want. The red on the girls dress is very vibrant but then the red on the swings aren't as bright which makes it obvious that it's been edited


This is film grain for our group this aged the frame instead of making it more vivid and bright. The colours are very dull which is very juxtaposed to what we want. Therefore we wont be using this effect


We finally decided to use this effect of teal and orange as it gave the whole of the frame brighter colour and made the characters stand out against the background. Having everything brighter makes it look more realistic as though it hasn't been edited. That's why we are using this effect

Editing: Draft Edit

After our two days of filming we decided to start editing, with the use of Final Cut Pro 10.  We started importing the clips and slowly began to cut them down and rearrange into our planned sequences.  For the first scene which is a flashback, we used a dark and contrasting effect which creates a grungy and dark feel, alluring a tense atmosphere and deep/dark connotations.   The effect also adds to the dilapidated look of the outhouse due to shadows being even larger and darker.  We used a low angle shot, looking up to the granddad which conceals the newspaper and what he is 'ripping out'.   It also conveys a sense of power as we are looking up to him.

In the main sequence of the thriller intro, we used a 'Teal and Orange' theme which gives a sense of surrealism leading to a calming yet creepy feel.  We used copyright free thriller music which also creates a creepy feel, whilst maintaining a calming and sombre atmosphere simultaneously. 
In the main sequence we used a 'over the shoulder' shot which shows what both characters are doing at the same time.  The granddad is writing in his diary and the girl playing, the focus on this scene foreshadows that something could happen to Hannah due to focus on the granddad's lack of attention shown to her.
We decided to feature the super close up in our intro because it is effective in showing that maybe the granddad is not all 'good,' therefore creating an enigma code.  His facial expression is quite 'creepy' and abnormal.  Because of the extent at which we focus on his face, audiences will ask whether they should trust him or not.  We chose the Granddad with facial hair which conceals part of his face because this can result in him being seen as less trustworthy and maybe a 'bad' character.


Sunday, 1 December 2013

Editing Effects

Combat
This effect has left the picture looking quite dull and dreary which mirrors the characters mood. Also it has left the white wall looking very bright but the brick wall looking dark and shadowed, this represents that the character has both good and bad side to him reinforcing the audiences ambiguity of whether he played a part in his granddaughters disappearance.
Glow
This effect dulls the entire shot and seams to have blurred the resolution slightly, the blurred quality could be useful as a clear contrast that would be established from the flashbacks and present time. However the dulled appearances doesn't have any good qualities in this scene so we are unlikely to choose this effect.


Hue Saturation
This effect has enhanced the colours giving a bright, happy, energetic feel to the scene, it is important that the audience understand this is the happy part of his life and the saturated colours help portray this. This effects works well with the scene and will be considered for the final draft.


Teal and Orange
This effect has made the trees leaves look greener which could represent the life in this flashback scene contrasting to the subdued man without his granddaughter in present time, however the green grass and the red dress aren't bright enough to convey the happiness the old man feels when with his granddaughter, therefore we are unlikely to use this effect in the final draft.